This post uses legacy configuration. I have updated this here
In this post I will cover how I use actionable notifications within Home Assistant. Using push notifications with the Home Assistant iOS App you can setup some really cool triggers within the system.
Below is a list of the technology used at the time of writing:
- Home Assistant - Version 0.60.1
- Apple iPhone X and iPhone 7
- Apple iOS 11.2.2
I have two actionable notifications that get used most often:
-
At 6AM I receive a push notification that asks if I am working from home today.
YesandNooptions are presented- If I answer
Yes, it will turn on the AC in my office and set the proper temperature based on the temperature outside.
-
On days when my wife and I go into our “real” offices we will receive a notification when we leave in the evening and the house is set to away. This notification asks if you are headed home.
YesandNooptions are presented- If
Yesis selected, it will set the air conditioner to the home setting to cool/heat the house in advance.
We will use my “Are you working from home today?” notification as the example1.
Step One:
I have an automation configured to send me a message asking if I am working from home on weekdays at 6AM if the house is in sleep mode:
- alias: Ask if Dan is working from home in the morning - Weekday
  id: ask_if_dan_is_working_from_home_in_morning_weekday
  condition:
    condition: and
    conditions:
      - condition: state
        entity_id: input_select.home_state
        state: sleep
      - condition: time
        weekday:
          - mon
          - tue
          - wed
          - thu
          - fri
  trigger:
    platform: time
    at: '06:00:00'
  action:
    service: notify.ios_dan_iphone
    data:
      message: "Are you working from home today?"
      data:
        push:
          category: "working_from_home"
The thing to key on here is the push category used in the action. This will be used later…
Step Two:
Now we need to configure the iOS push category that corresponds with the category used in the automation.
I keep my push categories in a separate file named ios_push_categories.yaml. Here is the excerpt from my configuration.yaml:
ios:
  push:
    categories: !include ios_push_categories.yaml
And here is the appropriate section fomr ios_push_categories.yaml:
NOTE: The identifier must be lower-case!
- name: Working From Home
  identifier: 'working_from_home'
  actions:
    - identifier: 'WORKING_FROM_HOME_YES'
      title: 'Yes'
      activationMode: 'background'
      authenticationRequired: no
      destructive: yes
    - identifier: 'WORKING_FROM_HOME_NO'
      title: 'No'
      activationMode: 'background'
      authenticationRequired: no
      destructive: no
This will provide the options that are presented with the notification and tie those options with an identifier. This will be used later…
Step Three:
This is where the rubber meets the road!
In this case the No option does nothing. The notification will close on the phone and that is all. But, ‘Yes’ will trigger an automation in Home Assistant.
Here is the automation that is triggered when Yes is selected:
- alias: iOS Action - Working From Home Yes
  id: ios_action_working_from_home_yes
  trigger:
    platform: event
    event_type: ios.notification_action_fired
    event_data:
      actionName: WORKING_FROM_HOME_YES
  action:
    - service: input_select.select_option
      data:
        entity_id: input_select.office_ac_power
        option: 'on'
    - service: input_select.select_option
      data_template:
        entity_id: input_select.office_ac_mode
        option: >
          {% if (states("sensor.dark_sky_temperature") | int) < 65 %}
          heat
          {% else %}
          cool
          {% endif %}
    - service: input_number.set_value
      data:
        entity_id: input_number.office_ac_temperature
        value: 72
Under the trigger event_data you will see that the actionName corresponds to the identifier used in Step Two. When Yes was selected it kicked off the automation to turn on the AC in my office and set the mode based on the outside temperature. It has worked great!
IMPORTANT NOTES!
Creating and Updating iOS Push Notifications:
Each time you create or update an iOS push notification within home assistant you must update oush settings within the iOS app.
To do this go into the settings (gear icon) within the iOS app and navigate to Notification Settings > Update push notifications.
Interacting with Push Notifications:
When you receive a notification on you iPhone, do not just tap on it! This will open the Home Assistant app and not present your options!
You can, however, tap notifications on your Apple Watch. See explanations below:
On iPhone:
-
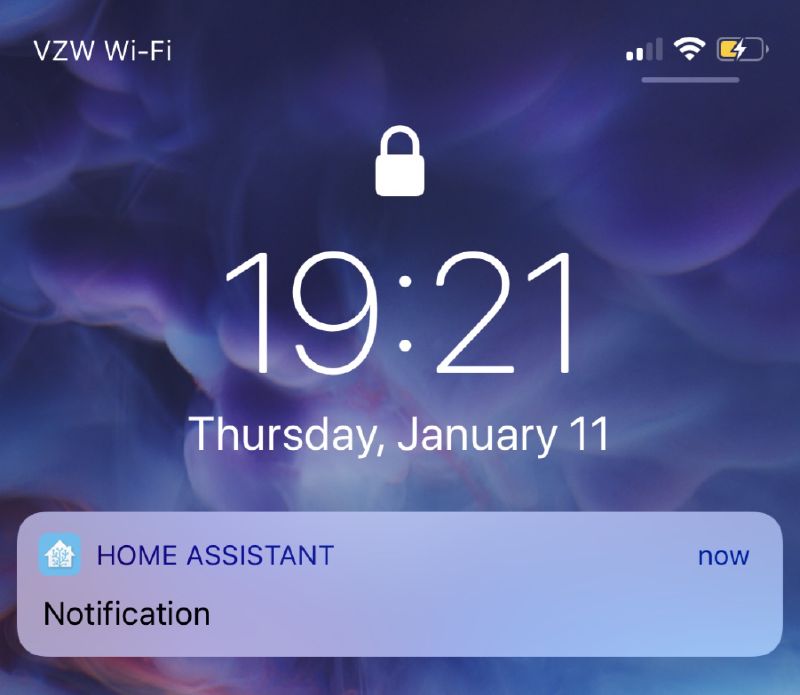
While phone is locked:
-
Your received notification will look like this:
-
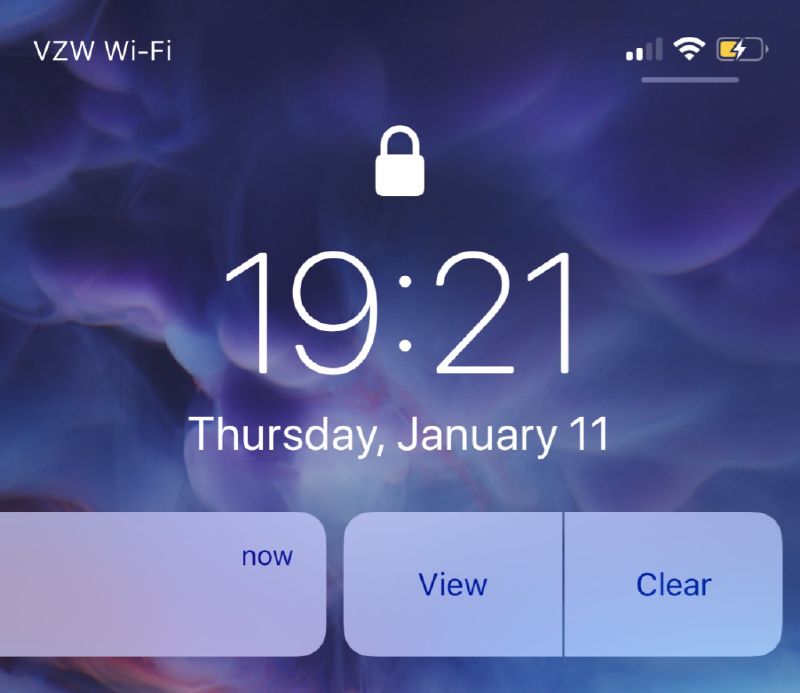
Swipe left on the notification and tap “View”:
-
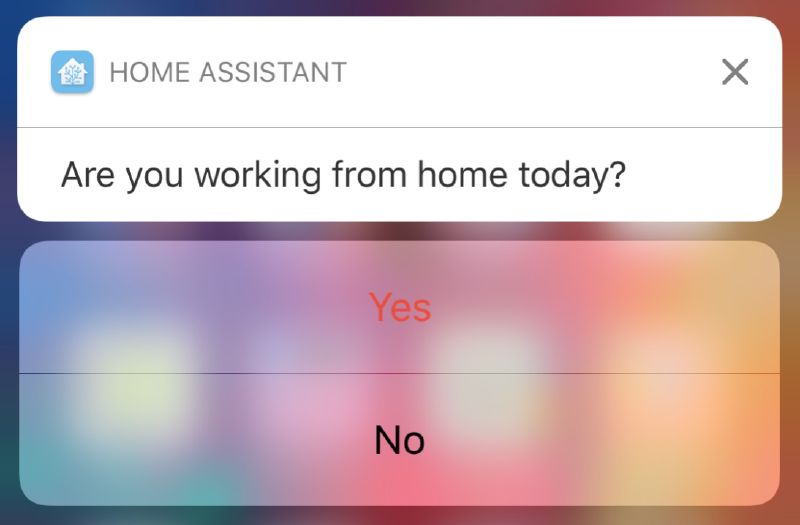
You will then be presented with your options:
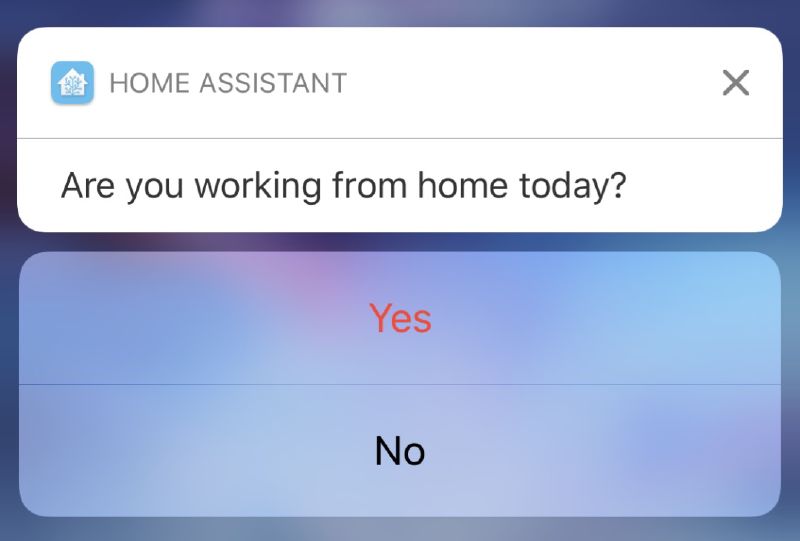
-
-
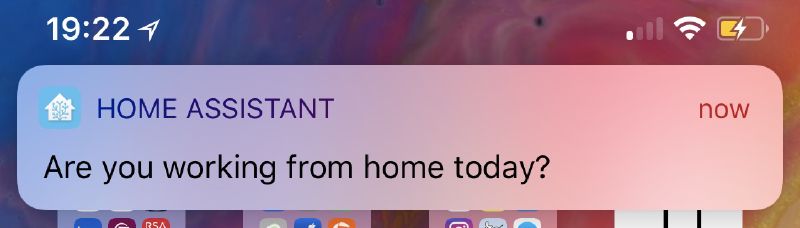
While phone is unlocked:
-
Your received notification will look like this:
-
Swipe down on the notification and you will be presented with your options:
-
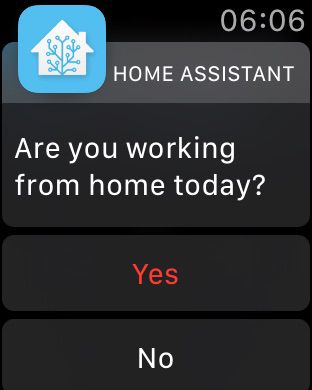
On Apple Watch:
-
Your received notification will look like this:
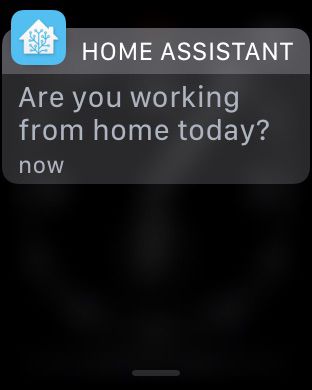
-
Tap the notification to receive your options:
Summary
This is covered often in the Home Assistant Community and I just wanted to get my configuration out in hopes that others will find it useful. If you have any questions feel free to leave a comment.
Thanks for reading!
12 Comments
Pierre Scerri
Friday, Feb 23, 2018
Hi
Nice tutorial.
I compared my setup with yours.
I still do not get the action button (I only have 1).
Notification works, but when I select “view” I get the message without the button.
Dan
In reply to Pierre Scerri
Monday, Feb 26, 2018
Pierre,
First, I want to thank you for your comment because it uncovered an issue with my static comment system. Glad to have that fixed now!
Second, would you mind sharing your code so we can troubleshoot? Or, do you have your HA config in GitHub where I can check it out?
Thanks,
Dan
Pierre Scerri
Tuesday, Feb 27, 2018
Here is the code:
Configuration.yaml:
Automations.yaml
Dan
In reply to Pierre Scerri
Tuesday, Feb 27, 2018
Pierre,
According to the documentation, the
identifiermust be lower-case.I was able to get the following working properly on my HA (version 0.64).
Configuration.yaml:
Automations.yaml:
Hope this helps! If you run into any other issues let me know.
I will be sure to add a note to this post about the
identifierlower-case requirement. Thanks for helping point that out.Dan
Pierre Scerri
Tuesday, Feb 27, 2018
Should have read the documentation shouldn’t I?
That solves the issue.
Thank you.
Dan
In reply to Pierre Scerri
Tuesday, Feb 27, 2018
Chris The Hoff
Sunday, Aug 5, 2018
Fernand
Sunday, Mar 31, 2019
Testy Tester
Sunday, Mar 31, 2019
Testy Tester
Tuesday, May 28, 2019
Dan
In reply to Testy Tester
Tuesday, May 28, 2019
Ash
Monday, May 25, 2020
Say something
Thank you
Your post has been submitted and will be published once it has been approved.
OK